
Carving a Kuksa: The Nordic Tradition Behind the Wooden Cup
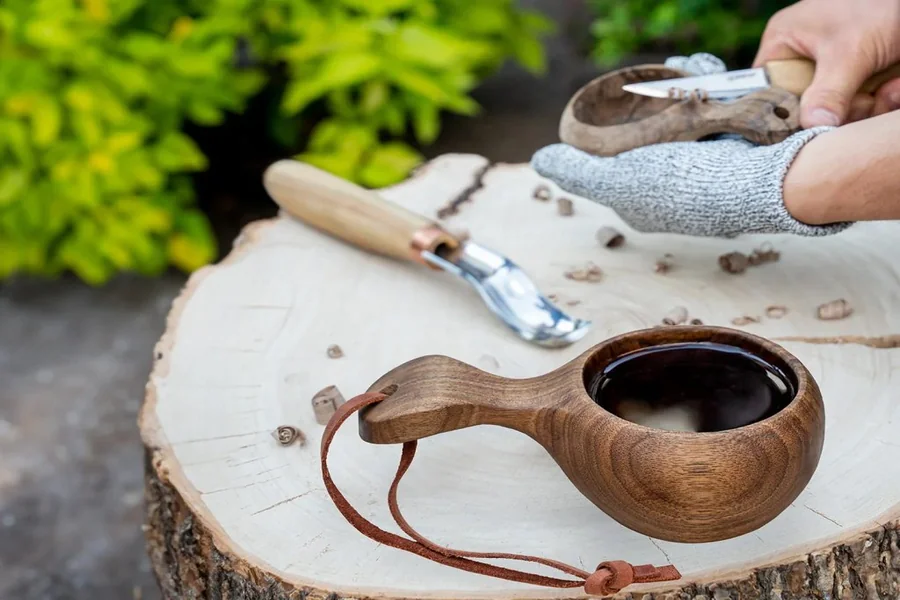
Long before insulated bottles and camping mugs, Nordic and Sami travelers carried a single carved wooden cup called a kuksa, cut from a burl or knot of birch and carried on a belt or pack for the length of a journey. The tradition survives today largely through wood carving hobbyists, and the kuksa has become one of the most rewarding intermediate projects a carver can take on, sitting somewhere between a simple spoon and a full carved bowl in terms of skill required.
Why Birch Burl Is the Traditional Choice
Wood selection is where a kuksa differs most from other carving projects. Traditional kuksas come from a birch burl, the rounded growth that forms on a birch trunk or root, prized because its swirling, interlocked grain resists cracking as the cup dries and is far less likely to split than straight-grained wood carved into a similar shape. Burl is not always easy to source, and plenty of modern carvers substitute a straight-grained hardwood blank instead, accepting a higher risk of checking or cracking as a tradeoff for availability. Whichever wood is used, carving from wet, unseasoned material and letting the finished cup dry slowly, often wrapped loosely in paper for several weeks, is the standard method for minimizing cracks.
The Carving Sequence, Step by Step
The carving sequence for a kuksa follows a predictable order, and skipping steps is the most common reason beginners end up with a lopsided cup.
- Rough out the exterior: typically with an axe or a sturdy knife, establishing the handle and rough outer profile
- Hollow the interior: the most technically demanding stage, using a bent gouge for deep excavation and a hook knife to refine the curve
- Finish the exterior and details: only once the interior is fully hollowed, since carving the outside first risks cutting through walls that need to remain a consistent thickness
Getting Wall Thickness Right
Wall thickness is the detail that separates a kuksa that survives years of use from one that cracks within a season. Somewhere around 5-8mm is a common target for the walls and base, thick enough to resist cracking and rough handling, thin enough that the cup does not feel clumsy in hand. Checking thickness by feel through the wall as hollowing progresses, rather than guessing, is a habit worth building early, since removing wood is easy and putting it back is not.
Finishing a Cup That Touches the Mouth
Finishing a kuksa is different from finishing most carved pieces because the object is meant to hold hot drinks and touch the mouth directly. Only food-safe oils and waxes belong here, most traditionally a mix of linseed oil and beeswax or a plain walnut oil, applied after the wood has fully dried and before the first use. Never use a kuksa with sealed or varnished walls, since that defeats the breathable, food-safe finish the tradition depends on.
Starting From the Right Blank and Kit
Because a kuksa demands specific tools at specific stages, in a way a simple spoon does not, carvers taking on their first kuksa benefit from a kit built specifically around the project rather than assembling tools piecemeal. STRYI’s kuksa carving kits, found at https://woodcarving-tools.com/collections/kuksa-carving-kits, pair the bent gouge and hook knife sizes suited to this exact sequence, sized appropriately for the depth and curvature a kuksa actually requires.
Choosing the right blank matters as much as choosing the right tools. Birch burl blanks sold specifically for kuksa carving are cut and partially dried with the finished shape in mind, reducing the odds of discovering a hidden crack or soft spot halfway through hollowing. A blank that has already been roughly shaped to the rough silhouette of a cup also saves considerable time compared to starting from a raw, unshaped chunk of burl, letting a first-time carver focus effort on the hollowing and finishing stages where the real skill of the project actually lives.
A finished kuksa is one of the few carved objects that gets better with use rather than staying static on a shelf. Each cup of coffee or tea darkens the wood slightly and deepens the patina, turning a first carving project into something genuinely used for years rather than simply displayed.